How To Make Models For 3D Printing In 3D Studio Max
3D Modelers use 3D Studio Max generally to create 3D Models for 3D visualization, Movies, and games. One would usually use applications dedicated to creating solid models, such as Solidworks, Fusion 360, Solid Edge, etc, to create 3D models for 3d Printing. For 3DS Max Users like us, learning these apps are not practical. We make 3D Models for 3D Printing inside 3D Studio Max as we sometimes receive requests from our existing clients to create 3D Models for Printing. Let’s see how we Make Models For 3D Printing inside 3D Studio Max.
The process of creating 3D Models for 3D Printers is the same as creating 3D Models for visualization. You just need to be a little careful about some technical aspects. And that’s all.
Check Model Integrity:
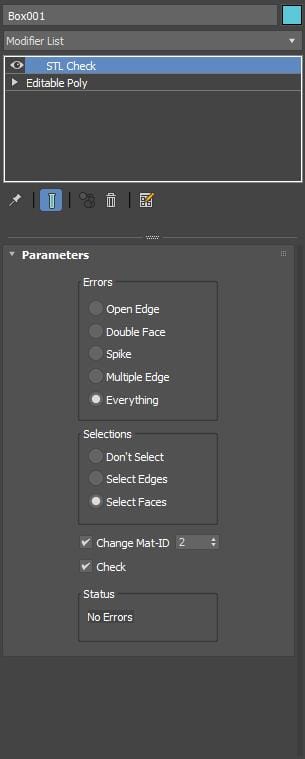
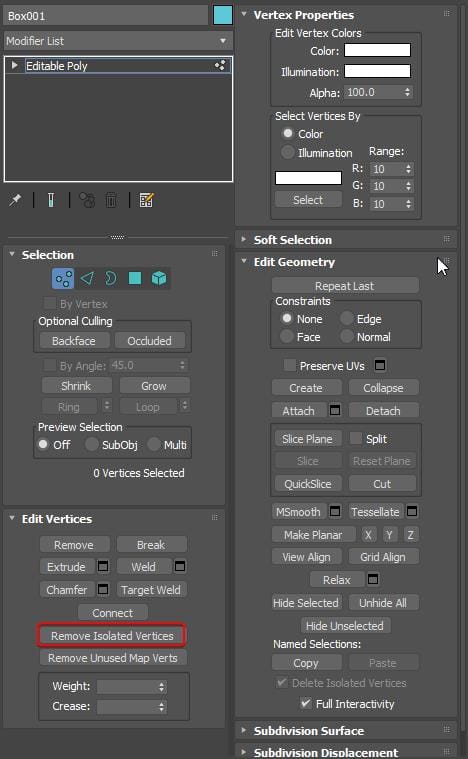
When making the 3D model keep in mind that your model needs to be watertight, i.e., it must have no holes, overlapping faces, or gaps. These issues could confuse the 3D printer about the interior and exterior boundaries of the object. Remove Isolated Vertices and edges. You can remove them by using the ‘Remove Isolated Vertices’ and ‘Remove Isolated Edges’ commands, which can be found under the ‘Edit Geometry’ roll-down menu in the ‘Edit Poly’ modifier. Use the ‘STL Check’ modifier in 3DS Max to check any holes or inconsistencies that you need to fix before proceeding.
Model Complexity:
Keep in mind the limitations of your 3D printer. Very complex models with a lot of detail may not print as intended. Know the minimum threshold your printer can print with the intended material. The level of detail you can achieve will depend on the capabilities of your 3D printer.
Wall Thickness:
Pay attention to the wall thickness of your model. Thin walls may not be sturdy enough to withstand the pressure of handling or the weight of the object itself, leading to breakage or deformation. Depending on the printer and material you’re using, thin walls may not print correctly or at all. They may end up being too weak to support the structure or might not adhere well to the build plate. If walls are near or below the minimum extrusion width that your printer nozzle can handle, it could lead to inconsistent extrusion, causing gaps or holes in the print.
If your thin-walled design requires support structures for overhangs or bridges, removing these supports, post-print can be challenging without damaging the print due to the fragility of thin walls.
Scaling Your Model:
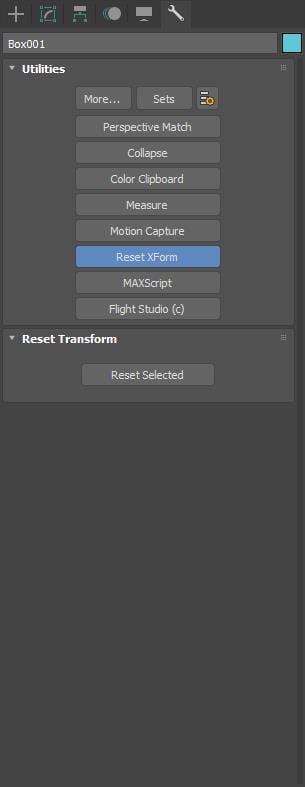
Before exporting, ensure your model is scaled correctly. 3DS Max uses generic units, so decide on a unit (millimeters, inches, etc.) that matches your 3D printer’s settings. To solve any scaling issue, you may need to reset the Xform of your 3D Model. Go to the settings tab and then choose reset Xform. Make sure to save your scene or hold it before resetting Xform, as you may not undo it afterward.
Overhangs and Supports:
Consider how your model will be printed layer by layer. Areas that overhang may need support structures, which can be added either in 3DS Max or in your slicing software, such as Ultimaker Cura, Simplify3D, or PrusaSlicer. Typically any angle over 45 degrees will need support.
If you can play around with the slicing software, we recommend adding support inside the slicing software instead of 3D Studio Max. Make sure the software has generated supports where you need them and that your model is properly supported.
Printer Capabilities:
Ensure that your model’s size fits within the printing area of your printer. Also, consider the material you will be using for printing, as this may affect the design and print settings.
Exporting Your Model:
Finally, you need to export your model in a format that your 3D printer can read. The most common format is STL.
These are pretty much all you need to be aware of if you want to create printable 3D Models inside 3ds max. These are the basic checks; if you keep this in mind while creating the 3D Models, you know how to make Models For 3D Printing In 3D Studio Max. If you have any questions related to this tutorial or need assistance in product modeling, please drop us an email. Please also make sure to visit our product rendering page to learn about our product rendering services.