The 3D Rendering Process
Most 3D Rendering projects follow a proven workflow. The steps are not secret, and they are not unique to one studio. What usually changes from one vendor to another is how clearly they communicate, how they manage approvals, and how smoothly they move from drafts to final visuals. The dtails of 3d rendering process varies companies to companies. The process below reflects how Professional 3D Visualization work is typically done.
If you want to see what we deliver, start here:
- Architectural rendering Service (For real estate developers, Interior designers and architects)
- Product Rendering Service ( For product brands who sells a catalog of products)
Why a clear process matters
A repeatable 3D Rendering process helps you control quality, reduce revisions, optimize costs, and keep timelines predictable. It also makes collaboration easier because everyone knows what gets approved first, what comes next, and when feedback is needed.
The 3D Rendering workflow from start to finish
Here is the process most studios follow, whether the job is Architectural Rendering or Product Rendering.
Step 1: Understand the goal and expectations
This starts with a short discussion to confirm what the images are for, who the audience is, what style you want, what the deadline is, and what the deliverables are. We also confirm important details like the number of revision rounds, image or video resolution, file formats, whether you want people in the scene or clean empty shots, and the mood and timing such as day, dusk, or night.
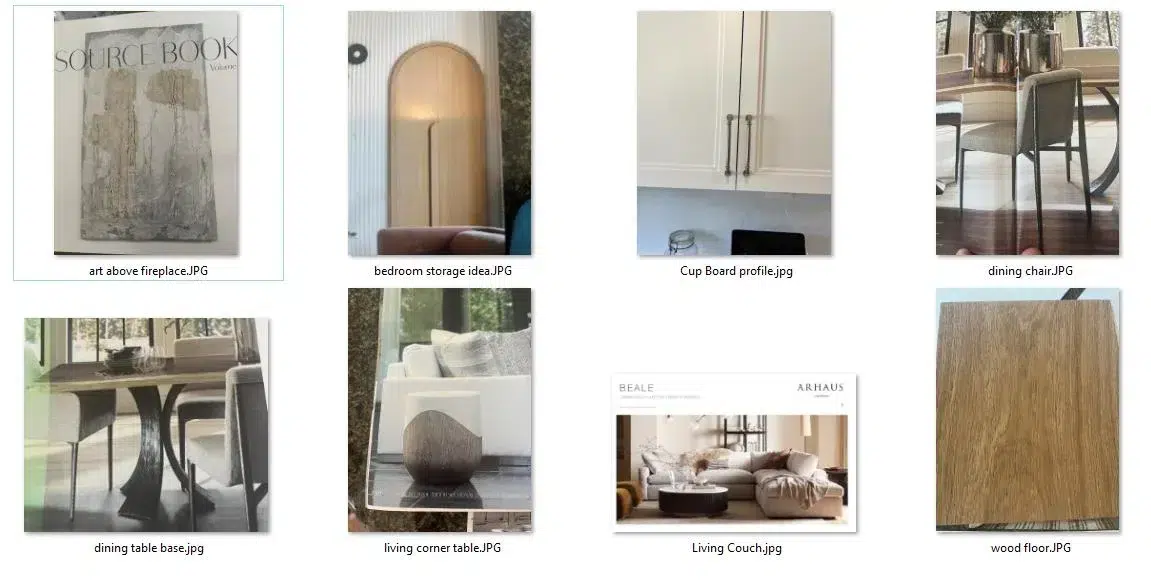
Step 2: Collect resources and references
The quality of input affects speed, cost, and accuracy. Depending on the project, this can include drawings, CAD, sketches, material specs, brand references, and inspiration images.
Step 3: 3D modeling or model cleanup
If you already have a 3D model, we will review it first to check how much effort it will take to clean it up or if it is ready to use. If you only have 2D drawings or photos, the model is built from scratch with correct scale and proportions.
Step 4: Camera angles and composition
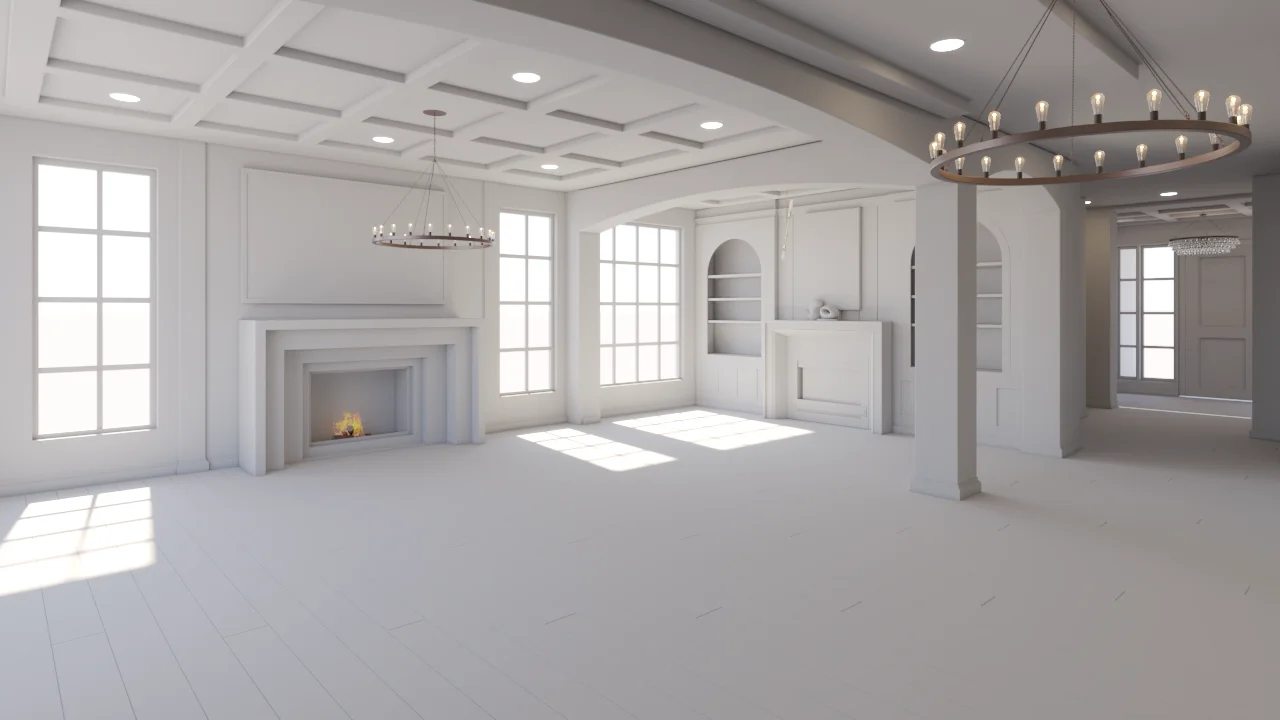
Before details, we lock camera angles through clay renders. This is where the story of the image is decided. A good angle can make a design look clear and premium even before materials are fully refined.
Step 5: Lighting setup
Lighting controls mood and realism. It is one of the most important parts of CGI Rendering, and it often gets fine-tuned throughout the project.
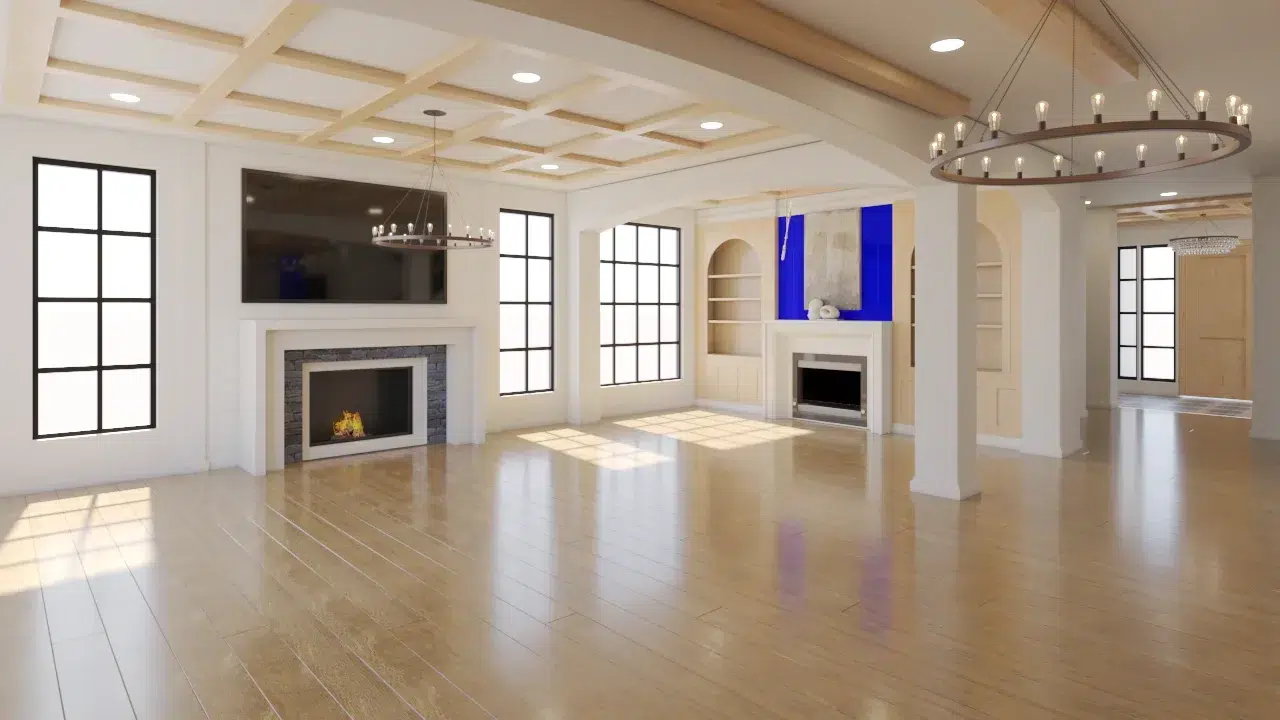
Step 6: Materials and textures
This is where the scene stops looking like clay and starts looking believable. Floors, walls, glass, metals, fabrics, wood grain, and finishes all need proper shaders and texture detail.
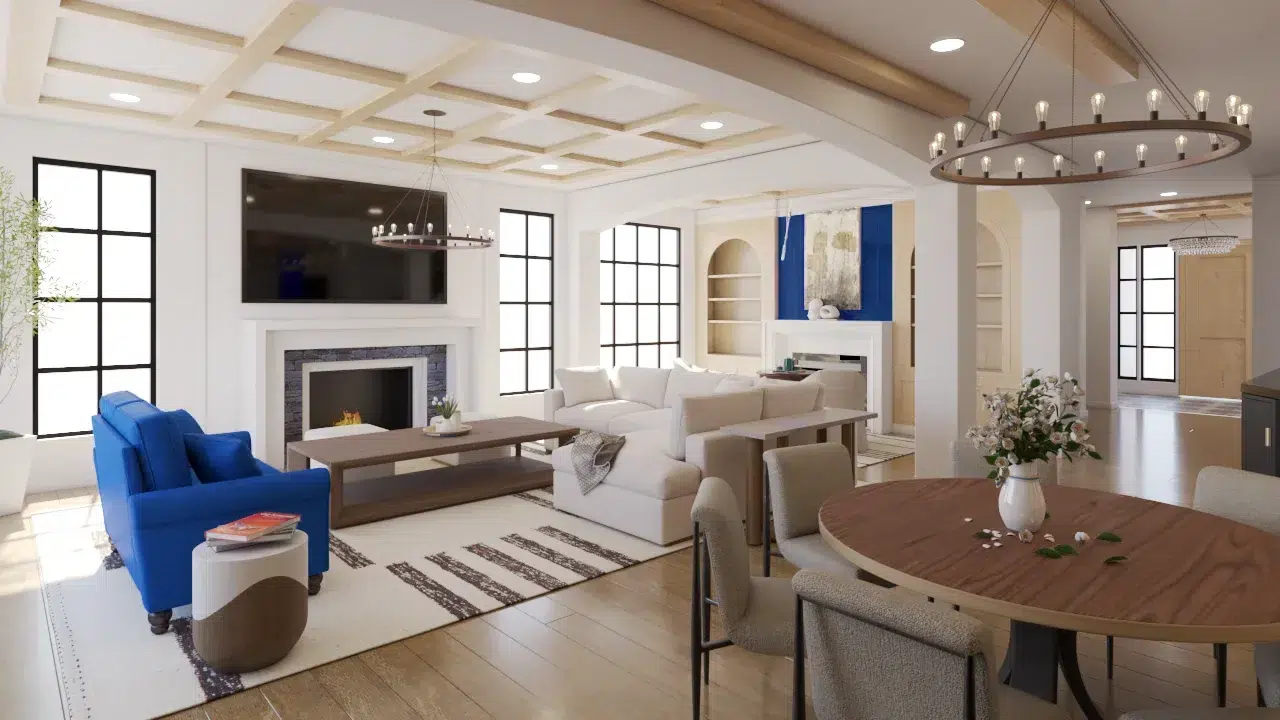
Step 7: Add scene elements
For architecture, this means furniture, fixtures, decor, landscaping, and context. For products, this means label placement, packaging details, props for lifestyle scenes, and correct staging.
Step 8: Draft renders and revision cycle
Draft images are shared for feedback, markups are applied, and the look is confirmed before final output.
Step 9: Final rendering
Once the drafts are approved, render settings are increased for final quality output.
Step 10: Post production
Post production usually includes color correction, contrast tuning, sharpening, small realism details, and final polish.
Step 11: Final delivery
Final files are delivered in the required formats and sizes, usually via our cloud server, Dropbox or Google Drive.
What we do differently at 7CGI
We follow the 3D Rendering process that most 3D Rendering companies follow at a macro level. But our workflow for architectural interiors and exteriors is different, and product rendering follows a different process than architectural work.
The steps are familiar, but execution matters. Here is what we do differently from others.
Architectural Rendering Process
Architectural Rendering follows the same workflow, but the details vary between interior and exterior visuals.
Interior rendering process
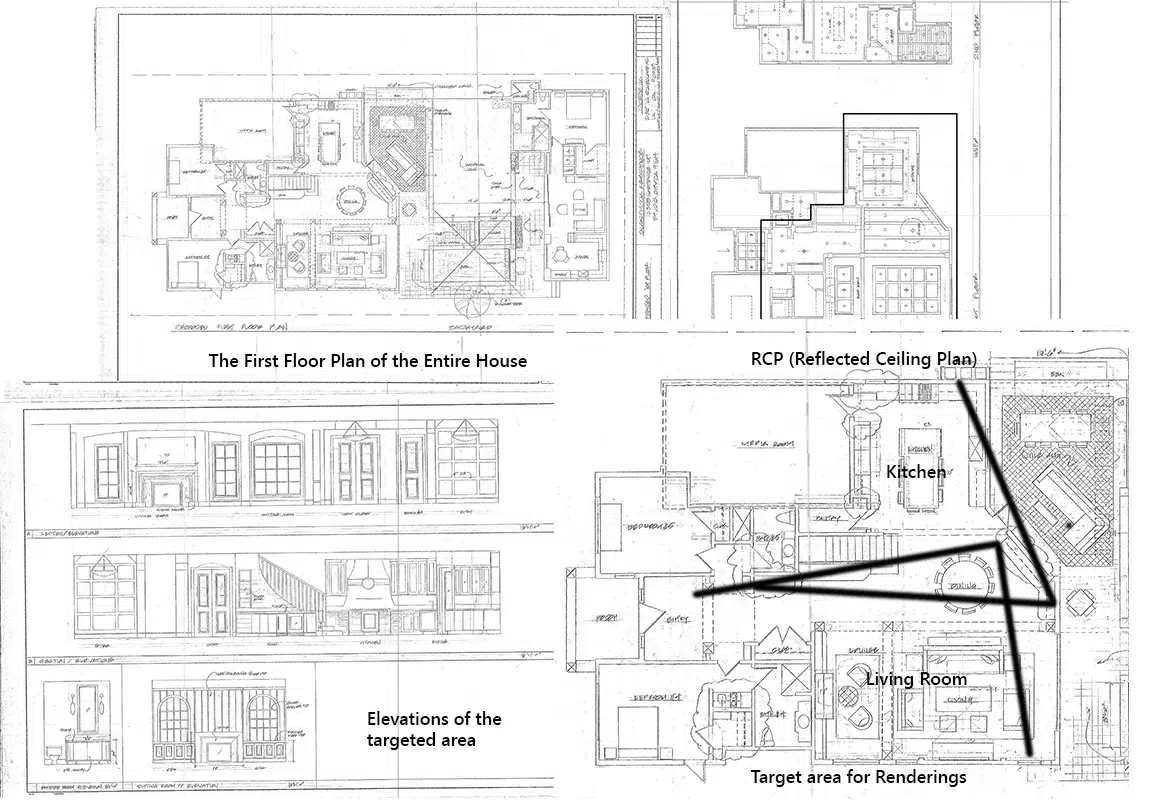
For interior rendering services, our process starts by collecting the available resources: drawing sets (floor plan, elevations, furniture layout, and RCP or ceiling and lighting plan), FF&E (the furniture and fixture list), mood boards, inspiration images, and competitor references.
Our 3D modeling team then builds the architecture and FF&E in parallel. If we cannot find suitable assets in marketplaces, we create them from scratch. Over the years, we have also built a large internal 3D asset library that helps us move faster.
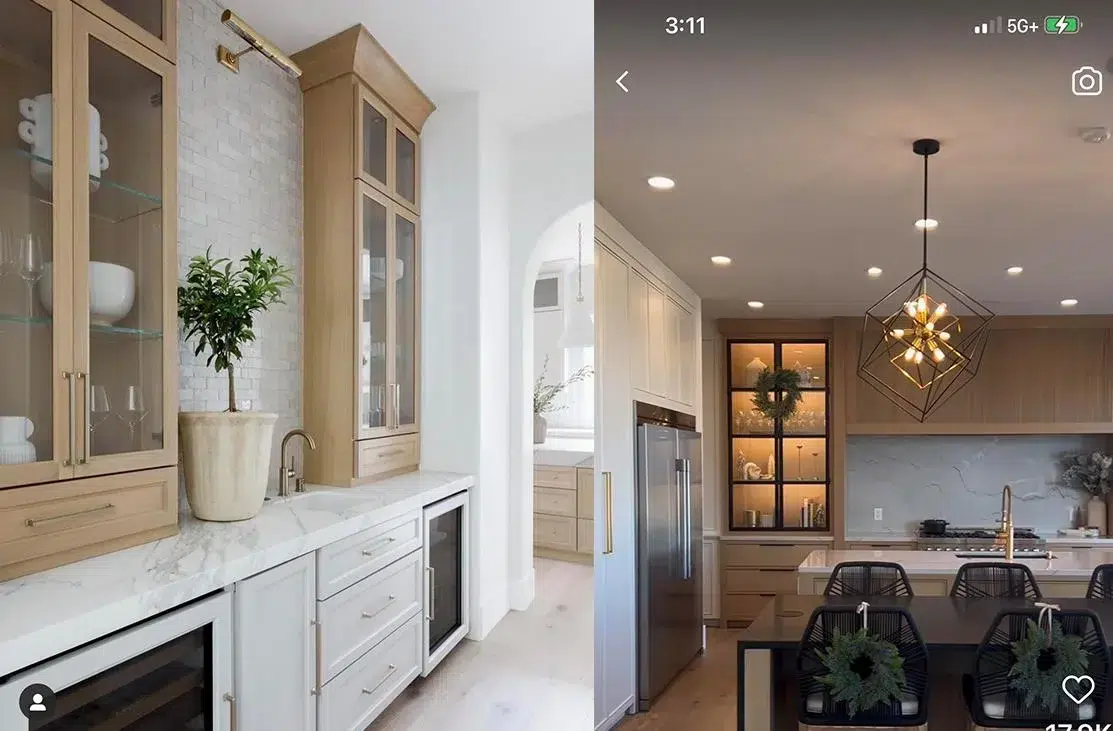
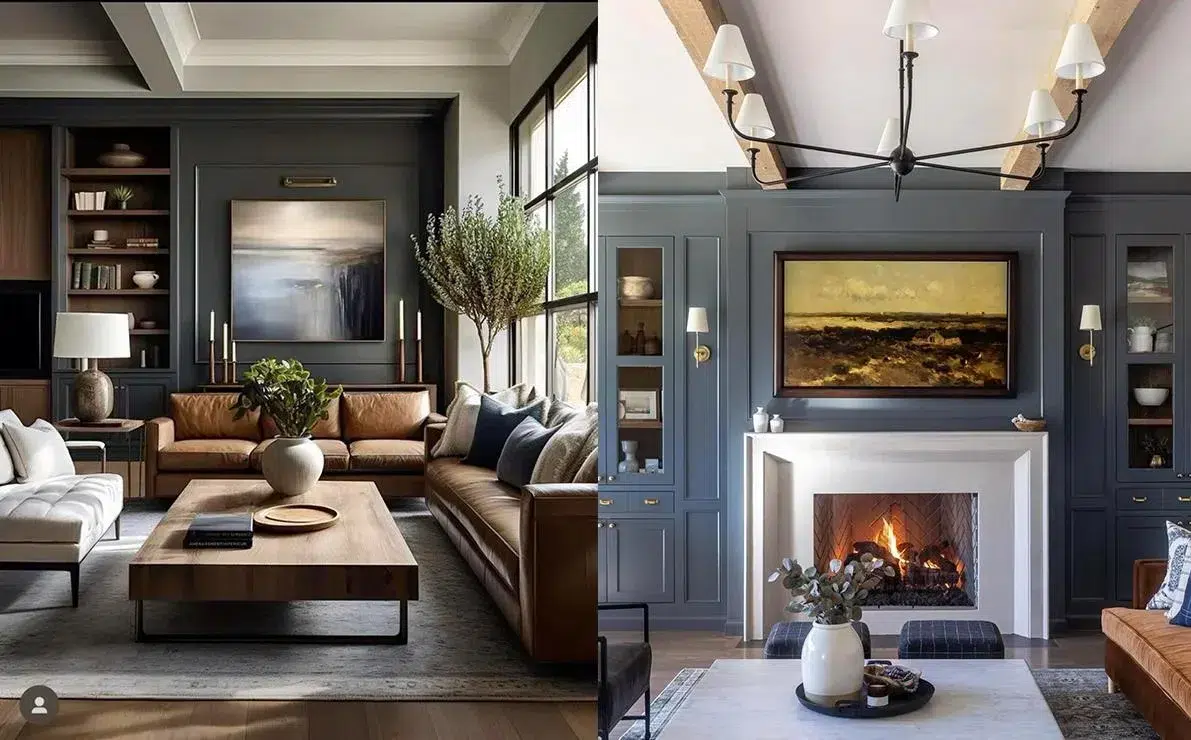
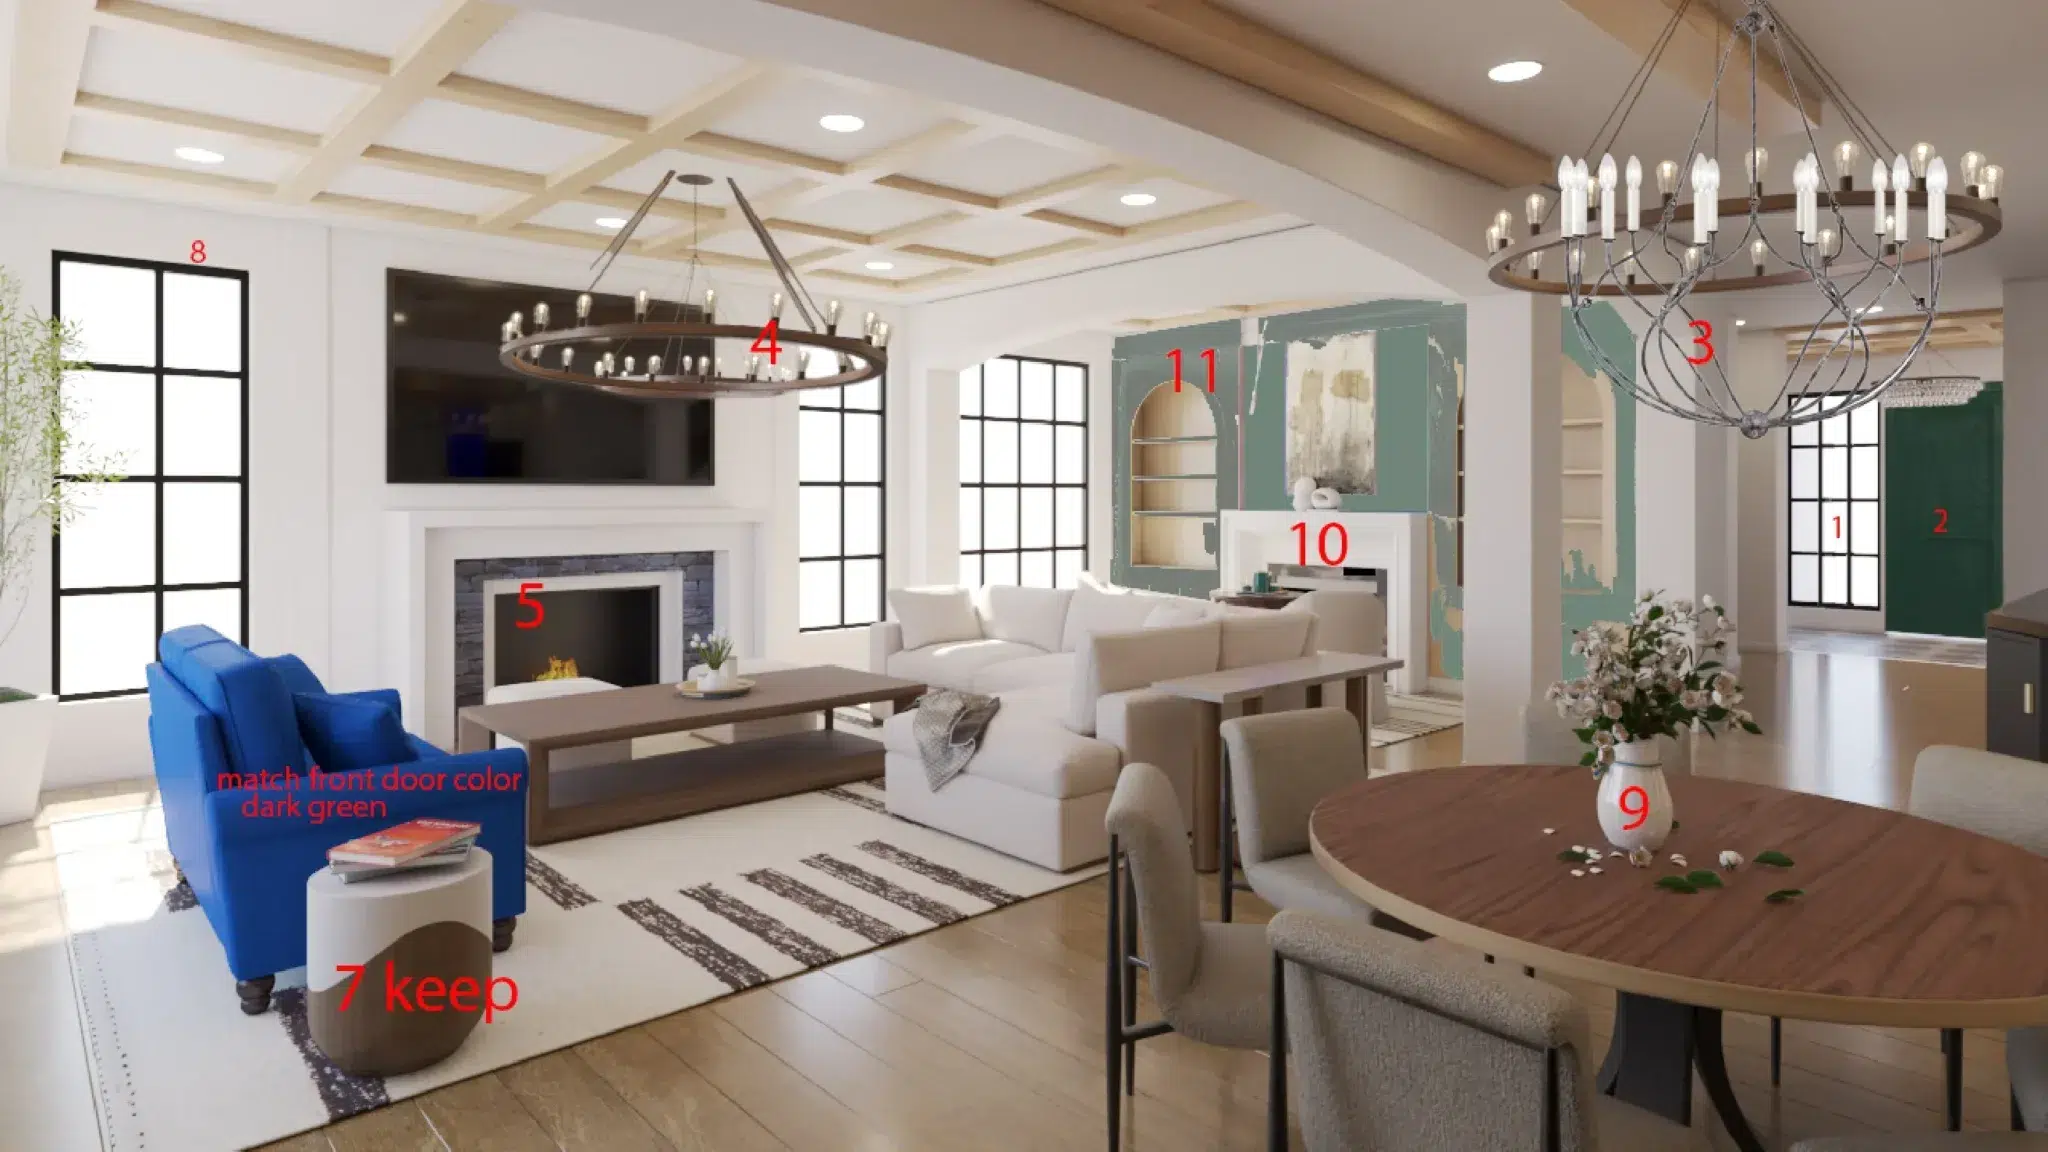
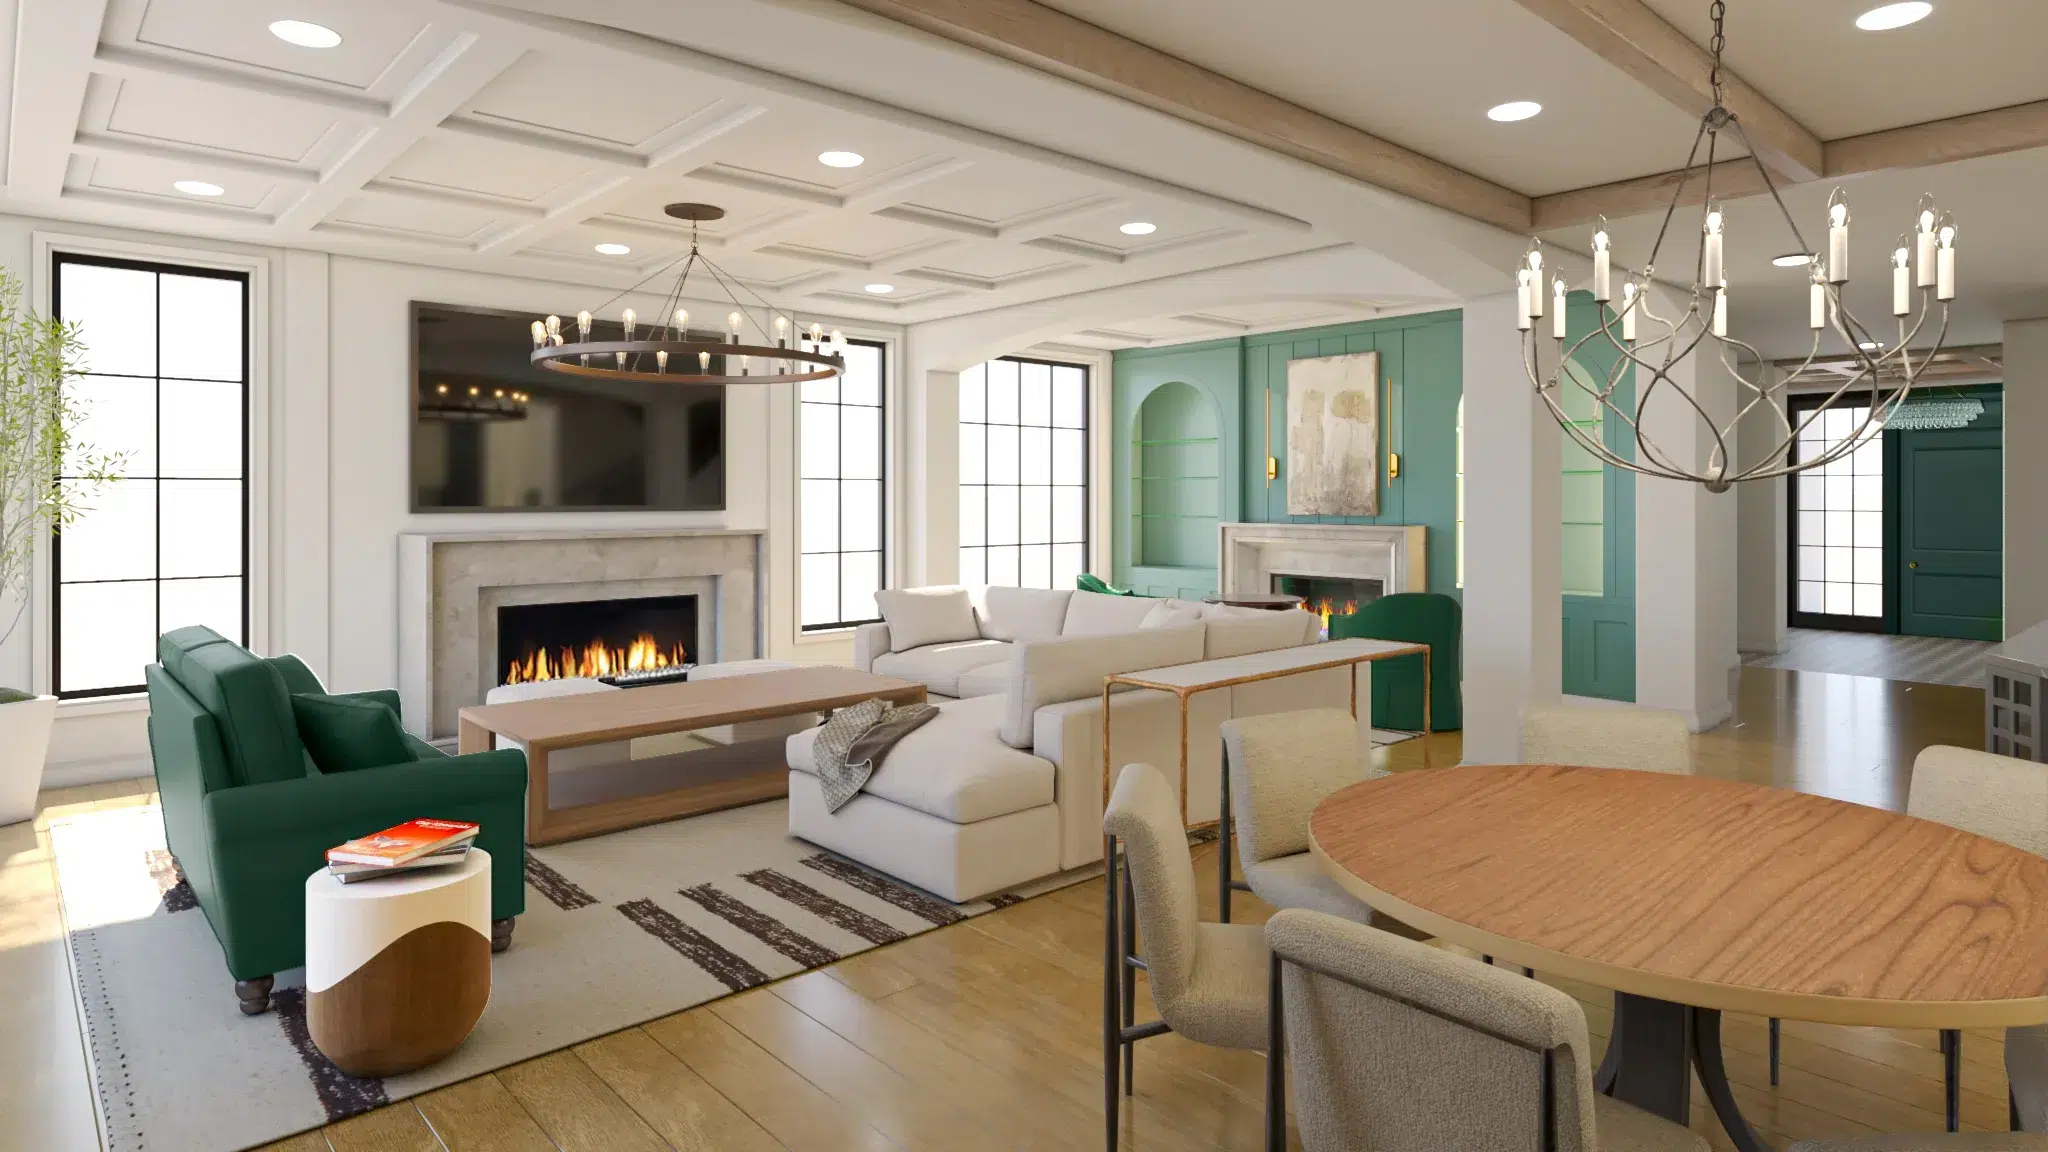
After you approve the colored renders of the empty space, we merge the furniture into the scene and produce draft renders. At this stage, we fine-tune framing and camera angles to get the strongest composition.
Throughout the process, we stay focused on small details that improve realism and overall presentation.
Exterior rendering process
For exterior rendering services, we start by reviewing the available resources such as drawings and site information. We also ask if you have a landscape plan. If not, we confirm whether a generic landscape is acceptable, especially for early stage visuals where the overall impression matters more than precise planting.
Someone from the, team models the architecture while another team member prepares the landscape. If a landscape plan is provided, we collect the 3D Model of the plant species and build the landscape in 3D. We also model the site context in parallel, so the building sits naturally in its surroundings.
Once the architecture model is ready, we send clay renders to confirm shapes, scale, and geometry. Next, we share colored renders of the empty building (without vegetation) to approve materials and lighting. After that, we produce full draft renders with landscape and context, then refine the images with your feedback. Most projects reach final approval within a couple of revision rounds.
The Architectural Rendering process ends with post production for both exterior and interior. At this stage, we go beyond the traditional workflow many studios still follow. Instead of spending excessive time creating every tiny wrinkle, reflection, or imperfection inside the 3D software, we handle many of those micro details in post with carefully used AI. We also use AI to improve the realism of 3D people when they are included in the scene.
Here are a couple of architectural rendering case studies if you would like to see live examples:
Product Rendering process
Although our 3D Product Rendering Services are designed to produce content for all platforms, we start by confirming where the visuals will be used (Amazon, Shopify, ads, packaging, AR, and more) because each platform has its own specs.
Next, we collect reference images and measurements. We can model from photos, but measurements make the build faster and more accurate.
If the 3D model will be used for AR (Augmented Reality), we plan for it upfront. AR models have specific technical requirements, so we prepare the geometry, UVs, and materials accordingly.
Then we collect material and finish references so surfaces look correct, and we build the 3D model with the right scale and details.
After that, we set the lighting and camera based on the product’s shape, material response, and key selling points.
If you need lifestyle images, we ask for inspiration and examples. If you need animation, we request a short script or outline, the purpose of the video, any storyboard if available, and a few references. If you need tech pack style visuals or infographic images, we can prepare those too.
Once the 3D model is ready, it can be reused for product animation, lifestyle scenes, 360 turntables, and future updates.
Here are a couple of product rendering case studies if you would like to see live examples:
Final thoughts
The 3D Rendering process is straightforward: scope, resources, modeling, lighting, materials, drafts, revisions, final renders, post production, and delivery. The best studios do not reinvent the steps. They execute them cleanly, communicate clearly, and reduce friction at every stage. That is what we aim to do at 7CGI.
We pay close attention to detail and to what matters most to the client. Each image is designed to highlight the project’s unique selling points, whether that is the space, the design features, or the product’s key details. Our pipeline uses the right tools for each stage: we model in 3ds Max, build textures and materials in Substance Painter, and render with Corona, V-Ray, or Unreal when the project calls for it. We also use AI tools in post-production to enhance realism and speed up final polish.